Landscape Lighting Design & Installation in Ormond Beach

Dark walkways, shadowy corners, a yard that disappears at sunset, and lighting wires that could damage your sprinkler lines: we plan the layout around your irrigation, install it right, and explain every step in plain words. We keep our appointments and return your calls. Family-owned since 1994 and rated 4.9 stars from 180+ Google reviews. Serving Ormond Beach, Daytona Beach, Port Orange, Flagler Beach, Palm Coast and the towns in between.

What Landscape Lighting Design & Installation Includes

A full lighting job covers more than the lights you see. It includes the plan, the fixtures, the transformer that powers them, the buried wire, sealed connections, a timer, and aiming each light after dark. When all of those parts are planned around your sprinklers and our salty coastal air, the system stays bright and simple to run.
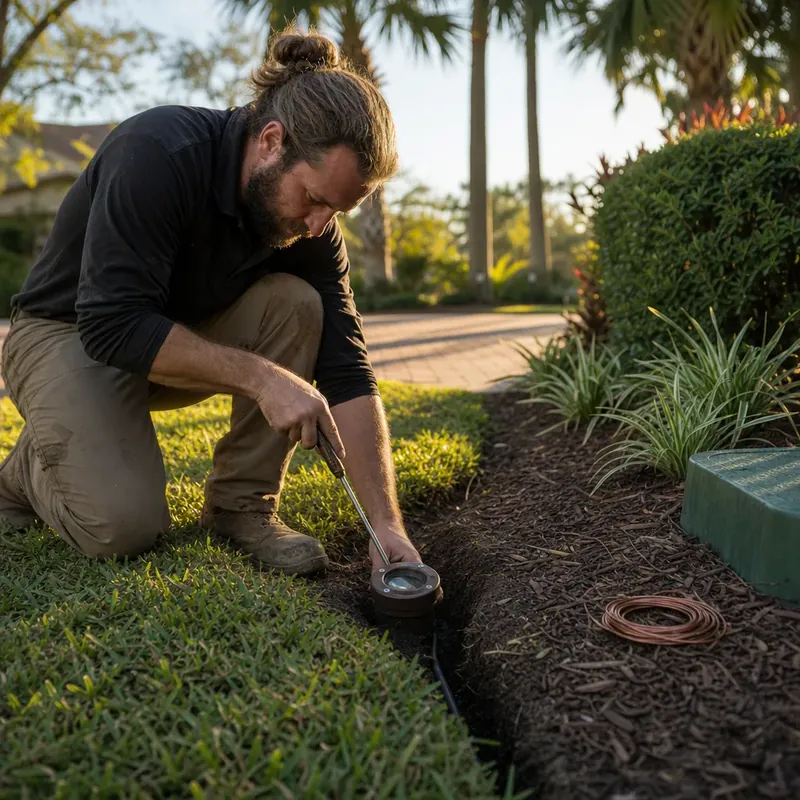
Landscape lighting wire being installed near an irrigation line

When you hear "landscape lighting," you probably picture the glow along a walkway or a palm lit up at night. That's the part you see. Most of the work is the part you don't see. Here's what a complete job should cover, so you know what to look for in any estimate.

  • A design walk. Someone looks at your yard with you and asks what matters most to you. Maybe it's safe steps to the front door, a lit driveway edge, or showing off an oak or a row of palms. The plan should say where each light goes and why.
  • The right fixture for each spot. Path lights sit low along walks and beds. Uplights and spotlights point up into trees or across the front of the house. Wash lights spread a soft glow over a wall or hedge. Each type does a different job.
  • A transformer. Most yard lighting runs on low voltage. The transformer plugs into an outdoor outlet and steps household power down to a safer, lower level. It has to be sized for the full set of lights, plus a little room if you add more later.
  • Buried wire runs. Low-voltage cable runs from the transformer out to each fixture, just under the soil or mulch. How the wire is laid out affects how evenly the lights shine from the first fixture to the last one.
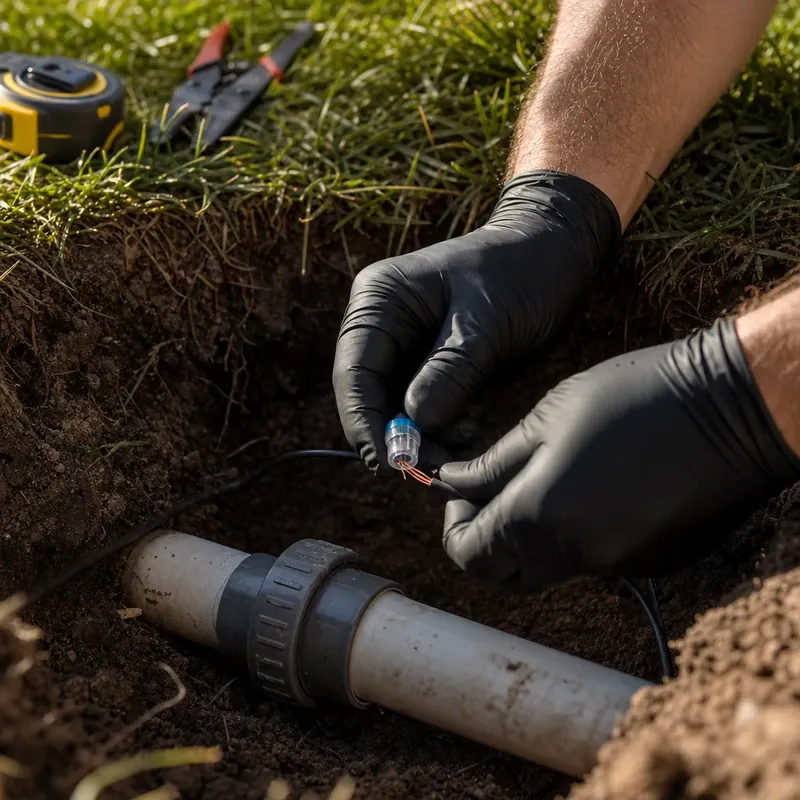
  • Sealed connections. Every splice where a fixture meets the main line needs to be waterproof. Wet connections are one of the most common reasons yard lights flicker or go dark.
  • Controls. A timer, a light sensor that turns lights on at dusk, or a smart timer you can adjust from your phone. Smart Lighting Timers & Automation has its own page if you want the details.
  • Night aiming and a walkthrough. Lights get their final adjustments after dark, when you can see the effect. Then you should be shown how the timer works and how to change it.

Your sprinklers matter here more than most people think. Lighting wire and sprinkler pipe often share the same shallow ground in a yard. If nobody knows where the irrigation lines run, a shovel can nick a pipe or a wire. A fixture placed right in front of a spray head can also get hit by water every morning. Over time that leaves hard-water spots on the lens and dims the light. Good placement keeps fixtures out of the spray and wire away from the pipe.

Ormond Beach adds its own conditions. Salt air near the coast is tough on metal parts, so fixture material matters. Our sandy soil drains fast and shifts easily, so fixtures need a firm footing or they'll lean after a few heavy summer storms. Those storms also test every connection in the ground. A plan made for these conditions is one you won't have to keep fixing.

If an estimate lists only "lights" and a single price, ask what it includes. Ask about the transformer size, the type of connections, the timer, and whether the lights get aimed at night. Clear answers up front mean fewer surprises later.
Planning Wiring Around an Existing Irrigation System

Lighting wire splice next to an irrigation pipe

If your yard already has sprinklers, the lighting plan has to start with them. Your sprinkler pipe and valve wire aren't on any public map. Utility locate services mark the lines that run to your house, like gas, power and water mains. They don't mark the private pipe and wire your sprinkler system uses. So someone has to figure out where those run before the first trench goes in.

A landscape lighting designer can draw a beautiful plan on paper. That plan still needs to show where the irrigation is, or the install crew ends up guessing with a shovel.

You can spot a lot of it yourself. Here's where to look:

  • Sprinkler heads in a line. They're almost always joined by pipe running straight between them.
  • Valve boxes. These are the round or square lids, often green, set in the lawn or beds. Bundles of colored wire run from them back to the controller.
  • The controller. It's usually on a garage wall or an outside wall. Valve wire fans out from there.
  • The backflow preventer. This brass part near the house is where the main water line for the sprinklers starts.

That valve wire is the part people miss most. It's thin, low-voltage wire, a lot like lighting cable. If a lighting run gets cut through it, one or more zones can stop turning on, and you might not notice for days. If that's already happened in your yard, our Sprinkler System Wire Breaks page explains the fix.

Once the irrigation layout is known, a few simple rules keep both systems safe:

  • Cross pipe, don't follow it. Lighting wire should cross sprinkler lines at a right angle instead of running alongside them in the same strip of ground.
  • Don't share a trench with the main line. If that pipe ever needs a repair, nobody wants to dig up lights to reach it.
  • Hand-dig near heads and valve boxes. A spade is gentler than a trencher where pipes come together.
  • Leave a little slack at each fixture. Our sandy soil shifts after heavy summer rain, and a tight wire can pull loose.
  • Keep a simple sketch. Mark where lighting wire runs next to your sprinkler zones, so future repairs don't turn into a hunt.

Power is the other place the two systems meet. The sprinkler controller and the lighting transformer often want the same outdoor outlet near the garage. Plan that spot so each one has room, and so the transformer wire isn't tangled up with the valve wire coming out of the controller.

Timing matters too. Sprinklers here usually run in the early morning, and most lights are set to shut off well before then. Setting the two timers so they don't overlap is an easy step. It's one more reason fixtures placed out of the spray, as covered above, stay clean and bright.

This is where our background helps. Irrigation is our everyday work. We install, repair and replace sprinkler systems of all brands and styles, and our owner, Brian Burke, has spent decades working on irrigation. Knowing how pipe and valve wire are usually laid out makes it much easier to plan lighting around them. That way you end up with lights that work and sprinklers that still water the whole yard.

If you're not sure your sprinkler coverage is right to begin with, it's smart to sort that out before lighting goes in. Our Sprinkler System Inspection & Coverage Audit page explains what that check looks at.

Signs You Need a New System vs. a Repair

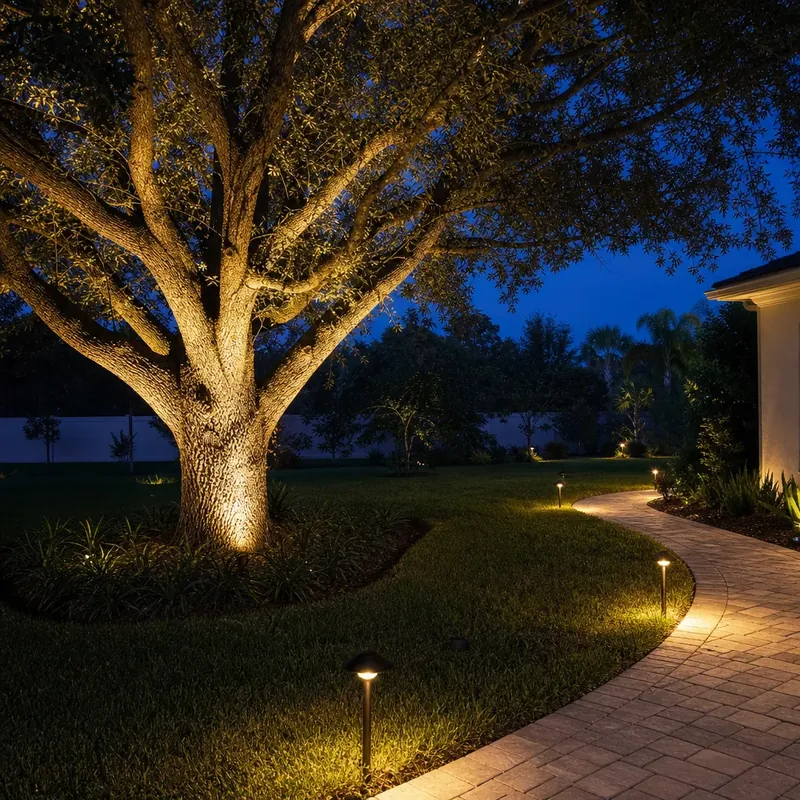
Oak tree lit by landscape lighting at dusk in Ormond Beach

If your yard already has lights and some of them have quit, you may not need a whole new system. A lot of the time it's a small fix. Here's how to tell the difference, starting with the easy stuff you can check yourself.

Check these before you call anyone:

  • The outlet. Many transformers plug into an outdoor outlet with a reset button. If it tripped during a storm, every light goes dark at once. Press reset and see if they come back.
  • The timer. A power blink can knock the clock out of sync, so the lights come on at noon or not at all. Set the time again.
  • One bulb. If a single light is out and the rest look fine, it's often just the bulb. You can swap that yourself.

If none of that works, these signs usually point to a repair, not a new system:

  • A few lights flicker or go out after heavy rain. That's often a wet splice, like we talked about earlier.
  • Lights at the end of a run are dimmer than the ones near the transformer. The wire layout or size may need a fix.
  • One fixture got hit by a mower or a car tire and now leans or won't light.
  • A section went dark right after someone dug in the yard. A cut wire is a likely reason.

Those are the kinds of problems our Landscape Lighting Repair page covers. Fixing a handful of connections or one damaged fixture usually costs far less than starting over.

A new system starts to make more sense when the problems are everywhere, not in one spot:

  • Most of the fixtures show rust, green crust or cracked lenses. Near the coast, salt air wears on every metal part at about the same rate. If half the yard looks that way, the other half isn't far behind.
  • You've added lights over the years and the transformer can't keep up. Lights dim, or the transformer runs hot.
  • Nobody knows where the wire runs, and it keeps getting cut. Each repair just patches the last guess.
  • Your yard has changed. Trees have grown past their uplights, beds have moved, or a new patio covers old wire. The lights no longer point at anything worth lighting.
  • You keep fixing something every few months. At some point the repairs add up to more than a fresh, planned layout.

There's also a middle ground. If your lights work fine but you're tired of resetting an old timer, you may only need a new control. Our Smart Lighting Timers & Automation page explains that option. You don't have to replace good fixtures just to get better timing.

If you're still not sure, that's normal. It's hard to tell a bad wire from a bad transformer just by looking. We'll come out, walk the yard with you, and check the lights and the sprinklers they share space with. Then we'll tell you plainly whether a repair will do the job or a new system is worth it.

When a Simple DIY Fix Is Enough

A lot of yard lighting problems don't need a pro. If the lights work but the yard just doesn't look as good as it used to, the fix is often something you can do on a Saturday with a rag and a pair of pruners. You've already seen the outlet, timer and bulb checks above. Here are a few more things worth trying yourself.

  • Wipe the lenses. A light can look dim when it's really just dirty. Sprinkler spray leaves hard-water spots, and mulch dust and pollen pile up too. A soft, damp cloth often brings back a lot of the glow.
  • Straighten a leaning light. Our sandy soil gets soft after a heavy summer storm, and path lights tip over. Pull the stake gently, pack the sand firm, and push it back in straight. Don't tug on the wire while you do it.
  • Re-aim a bumped fixture. If a mower or a dog knocked an uplight off its tree, turn it back by hand. Do this after dark, so you can see exactly where the beam lands.
  • Trim what's in the way. Plants grow fast here in summer. A shrub can swallow a path light in a few months, and new palm fronds can block an uplight. Cutting back the leaves is often all it takes.
  • Change the timer for the season. Days are shorter in winter and longer in summer. If your timer runs on fixed clock times, move the on time earlier or later so the lights match sunset. If you have a dusk sensor, make sure mulch, leaves or dirt aren't covering it.
  • Turn a spray head away from a light. Many spray heads can be turned a little by hand so the water hits the bed and misses the fixture. That keeps the lens cleaner.

None of these need special tools, and none of them need us. If one of them solves your problem, that's a good outcome. You don't need anyone's help for it.

If you're a seasonal resident, take a quick walk around the yard one evening before you leave and again when you get back. Leaning lights, overgrown beds and a timer that's off by a season are easy to catch on a short walk, and easy to fix when you do.

Here's where we'd suggest you stop:

  • Fixing it would mean cutting, splicing or reconnecting wire.
  • You'd need to open the transformer or move it to a new outlet.
  • You'd have to dig near valve boxes or sprinkler lines to get at the problem.
  • The light is still out or flickering after you've tried the steps above.

Those problems are usually in the wire or the connections, not the fixture you can see. Guessing at them tends to make the next repair harder. For everything on the first list, though, go ahead and handle it yourself.

What Drives the Cost of a Lighting Project

There's no single price for yard lighting, because no two yards need the same thing. Most of the cost comes from a handful of choices: how many lights you want, what they're made of, how far the wire has to travel, and what's in the ground along the way. Once you know those, a quote starts to make sense.

Here's what tends to move the number up or down:

  • How many fixtures, and what kind. A few path lights along the front walk is a small job. Lighting the walk, the driveway edge, three palms and the front of the house is a bigger one. Uplights and wash lights usually cost more than simple path lights.
  • What the fixtures are made of. Near the coast, sturdier materials that hold up to salt air cost more at the start. They also tend to last longer, so you replace fewer of them later.
  • The transformer. More lights need more power, so a large layout may need a bigger transformer or a second one. Planning a little extra room now costs less than swapping it out when you add lights later.
  • Distance and wire. The farther the lights are from the outlet, the more cable it takes. Long runs may also need heavier wire so the last light shines as bright as the first.
  • Where the wire has to go. Our sandy soil is easy to dig, which helps. But crossing a paved driveway or walkway, working around big oak roots, or weaving between sprinkler lines all take extra time and care.
  • Power at the right spot. If there's no outdoor outlet where the transformer needs to go, adding one is a separate job for a licensed electrician. Ask early so it doesn't come as a surprise.
  • Controls. A basic timer costs less than a smart timer you run from your phone. Either one works. It comes down to how much control you want.

LED bulbs matter too, mostly after the job is done. They use much less power than old halogen bulbs and last far longer, so your monthly bill and your bulb-changing chores both stay small.

You'll also see quotes built in different ways. Some list a price per fixture installed. Others give one price for the whole project. Neither is wrong, but they're hard to compare side by side. A per-fixture price might leave out the transformer, the timer or the trenching. A project price might include all of it. Ask each company to spell out what's covered.

A few questions that make any estimate clearer:

  • Is the transformer included, and how much room does it leave for more lights?
  • Are the timer and the night aiming part of the price?
  • What happens if the crew finds a sprinkler line or valve wire where they planned to dig?
  • Can I start with the front yard and add the back later?

That last one is worth thinking about if you're watching your budget. You don't have to light the whole yard at once. A good plan can start with the spots that matter most, like the front steps and walk, and leave room to grow.

Surprise add-ons are one of the worst parts of hiring anyone. Our estimates are free and come with plain advice and no pressure. We'll walk your yard, tell you what each part of the job is for, and you can decide what makes sense for you.

Frequently Asked Questions

How long does a landscape lighting installation take?

Most yards take a day or two, depending on how many fixtures you want and how far the wire has to run. A small front walk project with a handful of path lights moves faster than a full yard with uplights, wash lights, and trenching around sprinkler lines. Working around existing irrigation pipe and valve wire can add time, since crews hand-dig near heads and valve boxes instead of trenching straight through.

Will the lighting crew damage my lawn or landscaping during installation?

Careful trenching keeps damage to a minimum, especially since Ormond Beach's sandy soil is easy to dig and settle back into place. Near sprinkler heads, valve boxes, and tree roots, hand-digging is used instead of a trencher to protect what's already in the ground. Wire is laid just under the soil or mulch, so lawns and beds recover quickly once the job is done.

Can I add more lights to my system later without starting over?

Yes, as long as the original transformer has extra capacity built in. A transformer sized with a little room to spare can usually handle a few more fixtures down the road. If the transformer is already maxed out, adding lights later may mean upgrading it or installing a second one, which is why planning for growth upfront saves money.

Do I need to know where my sprinkler lines are before lighting goes in?

Yes, it matters a lot. Utility locate services mark public lines like gas, power and water mains, but they don't mark the private pipe and valve wire your sprinkler system uses. Someone has to work out where those run before the first trench is dug, or the crew ends up guessing with a shovel. That's why we plan lighting around your irrigation layout from the start.

Can landscape lighting wire damage my sprinkler system?

It can if nobody plans for it. Sprinkler valve wire is thin, low-voltage wire a lot like lighting cable, so a lighting run that cuts through it can stop one or more zones from turning on. To prevent that, lighting wire should cross sprinkler lines at a right angle, stay out of the main line's trench, and be hand-dug near heads and valve boxes.

What should a complete landscape lighting estimate include?

A full job covers more than the lights you can see. It should include a design plan, the right fixture for each spot, a transformer sized with room to grow, buried wire runs, waterproof connections, a timer or other control, and aiming the lights after dark. If an estimate lists only "lights" and one price, ask what's included.

Why do my yard lights flicker or go out after heavy rain?

A wet splice is one of the most common causes. Every connection where a fixture meets the main line needs to be waterproof, and our summer storms test every one of them. A few lights flickering or going dark after rain usually points to a repair at those connections, not a whole new system.

Will my sprinklers spray my landscape lights?

They can if the fixtures are placed badly. A light set right in front of a spray head gets hit by water every morning, and hard-water spots build up on the lens and dim the light. Good placement keeps fixtures out of the spray, and setting the lighting timer to shut off before the sprinklers run is an easy extra step.

Is low-voltage landscape lighting safe?

Most yard lighting runs on low voltage. A transformer plugs into an outdoor outlet and steps household power down to a safer, lower level. The transformer has to be sized for the full set of lights, plus a little room if you add more later. Leave any wiring, splicing or transformer work to a pro.

How do LED landscape lights compare with old halogen bulbs?

LED bulbs use much less power than old halogen bulbs and last far longer, so your monthly bill and your bulb-changing chores both stay small. They also let a transformer power more fixtures.

Ready to Plan Your Landscape Lighting?

Call 386-610-2882 or send us a message. We reply within 48 business hours to schedule your visit.

About Us

We diagnose, repair, and install irrigation systems and sprinkler systems in Ormond Beach, Daytona Beach, Port Orange, Flagler Beach and Palm Coast. License # SCC131152818

2500 John Anderson Dr
Ormond Beach FL 32176

Follow Us

Guarantees

  • On-Time Guarantee
  • Drug Free Guarantee
  • 100% Satisfaction Guarantee
  • 30 Day Limited Warranty on repairs and new installs and new installs and new installs and new installs

Payment

  • We gladly accept:
  • Most Major Credit Cards
  • Zelle or Wire Transfer
  • Check
  • Cash
Call NowGet Service Now